Makeup is a powerful tool to accentuate natural beauty and highlight unique features. However, choosing the right techniques and products can be challenging, especially since every face and every skin tone is unique. By considering your face shape and skin tone, you can optimize your makeup routine for a truly personalized result.
Analyzing Face Shapes for Optimal Makeup Application
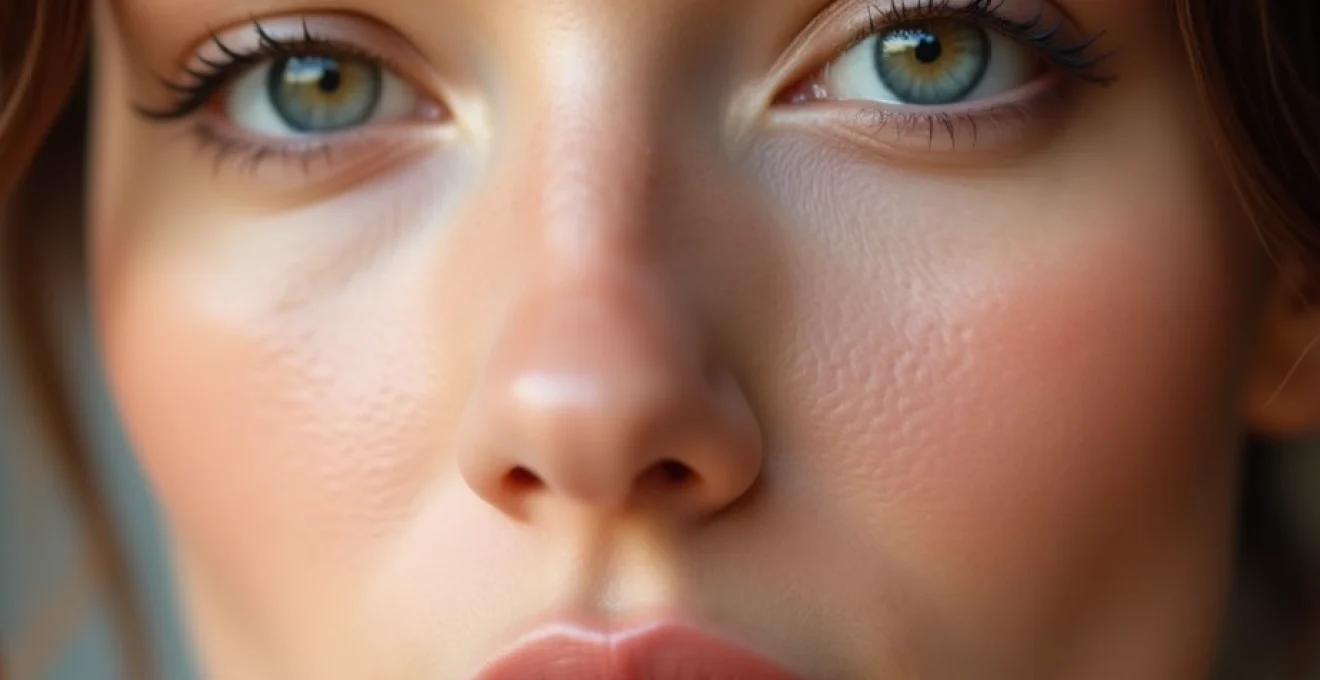
Understanding your face shape is essential for creating a balanced and harmonious look. By applying the right contouring and highlighting techniques, you can accentuate your best features and subtly correct any asymmetries. Let’s take a closer look at the most common face shapes and associated makeup strategies.
Oval Face: Techniques for Accentuating Natural Symmetry
An oval face is often considered the ‘ideal’ shape because of its natural balance and symmetry. With this face shape, the goal is to maintain and subtly enhance the existing harmony. Use a light hand when applying bronzer or contour, and focus on accentuating the cheekbones for a fresh, youthful look. A soft C-shape from the temple to the cheekbones can beautifully enhance the natural contours.
For an oval face, the ‘draping’ technique works particularly well. This involves applying blush in a diagonal line from the apples of your cheeks to your temples, creating a lifting effect and emphasizing the natural curves of the face. Use a soft, fluffy brush for a seamless transition.
Square Face: Strategies for Softening Angular Contours
A square face is characterized by a strong jawline and a wide forehead. The goal here is to soften the angular lines and create more curves. Contouring plays a crucial role in this. Apply a dark contour color along the sides of the forehead and the jawline, and blend carefully for a natural effect. This helps to visually reduce the width.
Highlighter is your best friend with a square face. Apply it to the center of the forehead, the bridge of the nose, and the center of the chin to bring these areas forward and thus draw attention away from the angular contours. A circular motion when applying blush to the apples of the cheeks can also help add softness to the facial structure.
Heart-Shaped Face: Balancing Forehead and Chin with Contouring
A heart-shaped face typically has a wider forehead and tapers to a narrower chin. The challenge here is to create balance between the upper and lower parts of the face. Start by contouring the temples and the sides of the forehead to visually narrow them. Then, apply a light contour color under the cheekbones and blend this well out towards the jawline.
To emphasize the chin and balance it with the wider forehead, you can apply a light highlighter to the tip of the chin. This subtly brings this area forward. Blush also plays an important role: apply it in a soft, upward motion on the cheekbones to draw attention to the center of the face and thus complement the heart shape.
Round Face: Methods for Creating a Defined Jawline
With a round face, the main goal is to create length and definition. Contouring is essential here. Apply a dark contour color along the hairline, under the cheekbones, and along the jawline. Blend this carefully for a natural shadow that visually lengthens the face. A diagonal placement of the contour under the cheekbones can help to create more structure.
Highlighter can be used strategically to bring certain areas forward. Apply it to the center of the forehead, the bridge of the nose, and the center of the chin to create a vertical line that visually lengthens the face. For blush, placement is crucial: apply it slightly higher on the cheekbones in an upward motion to create a lifting effect.
Remember that the goal of makeup is to enhance your natural beauty, not to completely change your face shape. Subtlety is key for a natural, radiant look.
Understanding Skin Tones and Undertones for Makeup Selection
After analyzing face shape, understanding your skin tone and undertone is the next crucial step in perfecting your makeup routine. The right color choices can make your complexion glow, while the wrong shades can make your skin look dull or unhealthy. Let’s take a look at some methods to determine your skin tone and undertone and how to apply this knowledge when choosing makeup.
Applying the Fitzpatrick Scale when choosing foundation
The Fitzpatrick scale is a scientific classification of skin types, originally developed to understand the reaction of different skin types to UV radiation. However, this scale can also be very useful when choosing the right foundation. The scale ranges from Type I (very light skin that always burns) to Type VI (very dark skin that never burns).
For people with skin type I or II, it is crucial to choose foundations with a high SPF factor and cool undertones. Type III and IV can often choose from a wider range of shades, but should pay attention to the correct balance between warm and cool. For type V and VI, it is important to choose foundations that are rich in pigment and complement the natural depth and warmth of the skin without weighing it down or making it look ashy.
Identifying Warm vs. Cool Undertones for Color Corrections
Identifying your undertone is essential for choosing the right makeup colors. There are three main categories of undertones: warm, cool, and neutral. A quick way to determine your undertone is to look at the veins in your wrist. Do they look greenish? Then you probably have a warm undertone. Do they look blue or purple? Then you lean more towards a cool undertone. If it is difficult to tell, you may have a neutral undertone.
For warm undertones, gold, peach, and earthy tones work best. Think of bronzers with a gold undertone and blushes in apricot or terracotta. Cool undertones shine in pink, blue, and purple tones. Rosy blushes and silvery highlighters are ideal here. Neutral undertones are lucky to be able to wear both spectrums, but should be careful not to lean too far to one side.
Using MAC’s Color System for Accurate Shade Matching
The color system of MAC Cosmetics has become an industry standard for categorizing skin tones. The system uses letters to indicate undertone (C for Cool, W for Warm, N for Neutral) and numbers to indicate the intensity of the shade. For example, NC20 stands for a light skin with a neutral to warm undertone.
This system can be very useful when choosing the right foundation, but also when selecting complementary colors for other makeup products. For example, someone with an NC45 shade (medium-dark with warm undertones) will look radiant in warm, golden bronzers and deep orange-red lipsticks. Someone with an NW10 shade (very light with cool undertones), on the other hand, will fit better with rosy blushes and cool, mauve lip colors.
The most important thing is to experiment and discover what works for you. Makeup rules are guidelines, not strict laws. Trust your intuition and what you find beautiful.
Adjusting Eye Makeup to Eye Shape and Skin Tone
The eyes are often regarded as the mirrors of the soul, and with the right makeup techniques, you can really make them speak. But just as face shapes and skin tones vary, so do eye shapes and the associated makeup strategies. Let’s take a look at some specific eye types and how you can adjust your makeup to them.
Hooded Eyes: Techniques for Enlarging the Eyelid
Hooded eyes are characterized by an extra skin fold that hangs over the moving eyelid, covering part of the eyelid. This can give the illusion of smaller eyes and makes applying eye makeup a challenge. The key here is to create the illusion of a larger eyelid.
Start by applying a light, matte eyeshadow over the entire moving eyelid. Then apply a darker shade in the crease, slightly above the natural fold. Blend this carefully upwards to create the illusion of more depth. A thin line of eyeliner, applied as close to the lashes as possible, can visually enlarge the eyes. Avoid thick lines or heavy smokey eyes, as these can actually make the eyes look smaller.
Monolids: Methods for Creating Depth and Dimension
Monolids are characterized by the absence of a visible eyelid crease. This eye shape is common among people of East Asian descent. The goal with monolids is to create depth and dimension without overpowering the natural beauty of this eye shape.
An effective technique is to create a gradient effect with eyeshadow. Start with a light shade at the inner corner of the eye and gradually work towards a darker shade at the outer corner of the eye. This creates the illusion of depth without forcing an artificial crease. Eyeliner can be used strategically to lengthen the eyes; try a thin line that thickens as you go towards the outer corner of the eye.
Also, experiment with color! Bright or metallic eyeshadows can look great on monolids and add interesting dimension to the look.
Lip Techniques for Different Lip Shapes and Skin Tones
The lips are a focal point in any makeup look and can change dramatically depending on the techniques and products used. Whether you are aiming for fuller lips, a defined cupid’s bow, or simply the perfect color for your skin tone, there are countless ways to accentuate your lip area. Let’s take a look at some specific lip techniques for different lip shapes and skin tones.
Thin Lips: Volume-Enhancing Contouring Methods
For those with thinner lips, the main goal is often to create more volume. An effective technique for this is overline contouring. Start by drawing the lip contour just outside your natural lip line with a lip pencil that is one shade darker than your natural lip color. Focus especially on the center of your upper lip and the center of your lower lip to create a fuller effect.
After contouring, fill in the lips with a lipstick that matches your natural lip color or is slightly lighter. Then apply a light highlighter to the center of your upper lip (the cupid’s bow) and in the center of your lower lip. This reflects light and creates the illusion of fuller lips. Finish with a glossy lip gloss in the center of both lips for extra dimension.
Full Lips: Balance Techniques with Lip Plumpers and Matte Formulas
For those with naturally full lips, the challenge is often to create balance without losing the natural fullness. Matte lipsticks can work great here because they draw attention to the shape of the lips without adding extra volume. Choose a lip plumper with a subtle effect to enhance the natural fullness without exaggerating.
Another effective technique is using ombre lips. Apply a darker shade to the outer edges of your lips and a lighter shade in the center. Blend these carefully for a seamless transition. This creates depth and definition without making the lips look fuller than they are. For a polished finish, you can lightly powder the edges of your lips to keep the lip line sharp.
Selecting MLBB (my lips but better) Shades for Diverse Skin Tones
Finding the perfect MLBB (My Lips But Better) shade is an art in itself, especially since it is different for everyone. The goal is to find a lipstick that enhances your natural lip color and gives your whole look a subtle boost. For lighter skin tones, soft pink or peach shades often work well as MLBB colors. People with a medium skin tone can choose mauve or soft coral shades. For deeper skin tones, rich berry or terracotta shades are often beautiful MLBB options.
A useful tip for finding your perfect MLBB shade is to look at the color of your gums. Choose a lipstick that approximates this color, but then just slightly more intense. Always test multiple shades and view them in natural daylight for the best result. Remember that an MLBB shade should make your lips look healthy and full of life, without it being obvious that you are wearing lipstick.
Advanced Contouring for Facial Structure Optimization
Now that we have discussed the basics of makeup for different face shapes and skin tones, it is time to delve deeper into advanced contouring techniques. These methods allow you to subtly optimize your facial structure and create a sculpted look that still looks natural. Let’s look at some innovative products and techniques that can take your contouring game to the next level.
Using Fenty Beauty’s Match Stix for Precision Sculpting
Fenty Beauty’s Match Stix have taken the makeup world by storm with their versatility and ease of use. These magnetic makeup sticks are ideal for precision contouring because of their creamy texture and blendable formula. Start by applying the dark contour color in a herringbone pattern under your cheekbones. Then use a damp beauty blender to gently blend the edges for a seamless transition.
For extra definition, you can also use the Match Stix to contour your nose. Draw two thin lines along the sides of your nose bridge and blend them carefully. This creates the illusion of a narrower, more defined nose without looking unnatural. Don’t forget to lightly highlight the tip of your nose for a balanced effect.
Applying Non-Touring Technique for a Natural Finish
Non-touring is a more subtle approach to contouring that is perfect for a natural, everyday look. This technique combines elements of contouring, highlighting, and bronzing to create a soft, sculpted look without harsh lines. Start by applying a tinted moisturizer or a light foundation as a base. Then apply a liquid bronzer to the places where the sun would naturally hit your face: forehead, cheekbones, and along the jawline.
The key to successful non-touring is using products with a light, buildable texture. Work in thin layers and gradually build up the intensity. Use a damp makeup sponge to blend everything together seamlessly. Finish with a liquid highlighter on the highest points of your face for a subtle glow. The result? A fresh, radiant look that looks like you’ve just returned from a relaxing vacation.
Integrating Draping Method for Personalized Face Lighting
Draping is an innovative technique that uses blush to sculpt and illuminate the face. This method, originally popular in the 70s and 80s, is making a comeback due to its ability to create a soft, youthful appearance. With draping, you apply blush not only to the apples of your cheeks, but also strategically to other parts of your face to create a lifting effect.
Start by choosing a blush that is complementary to your skin tone. Apply it in a C-shape, starting at your temples, over your cheekbones, and ending just above your jawline. Use a light hand and gradually build up the color. For extra dimension, you can use two different blush shades: a deeper shade for the contours and a lighter, radiant shade for the highest points of your cheekbones. This technique works particularly well for people with a rounder face, because it creates the illusion of more defined cheekbones.